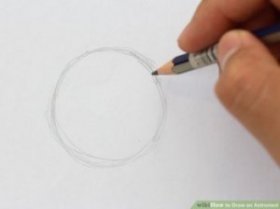
 Draw a large circle. Sketch a large circle near the top of your paper. Keep the circle as evenly round as possible.
This first circle will eventually become the outer perimeter of the astronaut's helmet.
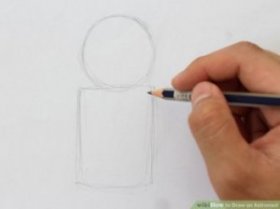
Place a rectangle beneath the circle. Draw a rectangle that overlaps the bottom fifth of the circle. The size of the rectangle should be similar to the size of the shape.
Also note that the height of the rectangle should be only slightly longer than its width, making it just a little too long to consider it a square.
This portion will eventually become the astronaut's torso.
Connect two sets of smaller quadrilaterals to the rectangle. Draw one square-like shape coming off from the top right side of the rectangle, then connect a second similar shape to the far side of the first. Repeat on the top left side of the rectangle, as well.
These will become the arms of the astronaut.
The total length of both quadrilaterals in one set should roughly match the height of the original rectangle, and the width of each one should be close to its height.
The exact placement and direction of these quadrilaterals will vary based on personal choice, though.
If you want the arm to be straight, draw the set pointing outward and at a slight downward angle.
If you want the arm to be straight up, draw the set pointing outward and at a slight upward angle.
If you want the arm to curve, draw the first quadrilateral pointing outward, but slant the sides of the second quadrilateral so that bends in the appropriate direction.
Place two more quadrilateral sets beneath the rectangle. Draw a series of three quadrilaterals beneath the rectangle on the right side. Draw another series of three quadrilaterals on the left side, too.
These will become the legs.
The first quadrilateral should connect to the bottom of the rectangle, and it should also be the largest.
The second in the set should angle slightly inward and be two-thirds the size of the first.
The final in the set should angle slightly outward and match the size of the second. These will become the astronaut's boots.
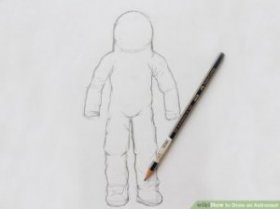
Smooth out the lines of the body. Trace over any sharp corners to create a more rounded figure, then erase any pencil lines that do not belong.
Flatten the bottom of your starting circle, giving it rounded corners.
Erase most of the connecting lines between the quadrilaterals in the arms and legs. The only connecting lines you should leave are those between the torso and upper legs, and those between the lower legs and boots; make these connecting lines rounded instead of sharp.
Draw a large circle. Sketch a large circle near the top of your paper. Keep the circle as evenly round as possible.
This first circle will eventually become the outer perimeter of the astronaut's helmet.
Place a rectangle beneath the circle. Draw a rectangle that overlaps the bottom fifth of the circle. The size of the rectangle should be similar to the size of the shape.
Also note that the height of the rectangle should be only slightly longer than its width, making it just a little too long to consider it a square.
This portion will eventually become the astronaut's torso.
Connect two sets of smaller quadrilaterals to the rectangle. Draw one square-like shape coming off from the top right side of the rectangle, then connect a second similar shape to the far side of the first. Repeat on the top left side of the rectangle, as well.
These will become the arms of the astronaut.
The total length of both quadrilaterals in one set should roughly match the height of the original rectangle, and the width of each one should be close to its height.
The exact placement and direction of these quadrilaterals will vary based on personal choice, though.
If you want the arm to be straight, draw the set pointing outward and at a slight downward angle.
If you want the arm to be straight up, draw the set pointing outward and at a slight upward angle.
If you want the arm to curve, draw the first quadrilateral pointing outward, but slant the sides of the second quadrilateral so that bends in the appropriate direction.
Place two more quadrilateral sets beneath the rectangle. Draw a series of three quadrilaterals beneath the rectangle on the right side. Draw another series of three quadrilaterals on the left side, too.
These will become the legs.
The first quadrilateral should connect to the bottom of the rectangle, and it should also be the largest.
The second in the set should angle slightly inward and be two-thirds the size of the first.
The final in the set should angle slightly outward and match the size of the second. These will become the astronaut's boots.
Smooth out the lines of the body. Trace over any sharp corners to create a more rounded figure, then erase any pencil lines that do not belong.
Flatten the bottom of your starting circle, giving it rounded corners.
Erase most of the connecting lines between the quadrilaterals in the arms and legs. The only connecting lines you should leave are those between the torso and upper legs, and those between the lower legs and boots; make these connecting lines rounded instead of sharp.
 Part 2
-
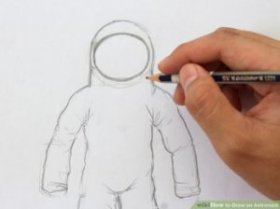
Create a visor in the helmet. Draw a horizontal oval in the large beginning circle.
The sides and bottom of this visor oval should be close to the perimeter of the outer helmet, but they shouldn't touch. Furthermore, there should be about twice as much space between the top of the visor and the top of the helmet.
Give the astronaut a backpack. Draw a large rectangle behind the astronaut. This backpack rectangle should start just beneath the top of the helmet and end slightly above the astronaut's waistline.
Depending on the angle of the astronaut, you may need to add dimension to the backpack by adding sides or a top that point toward an invisible vanishing point.
Note that the lines of the backpack should all remain behind the figure of the astronaut; do not overlap them.
Add hands. Draw one hand on the end of each arm. Astronauts wear gloves (not mittens), so you'll need to draw the fingers of each hand, too.
If you're viewing the astronaut from the front and viewing his hands from their sides, however, you can simplify the shape of each hand into an "L" shape, with the thumb facing down for each one. This should mimic the side view of the hand well enough.
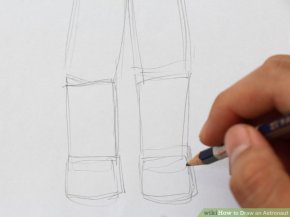
Define the boots. Sketch a line beneath each boot. This line should run parallel to the bottom of the boot. It should also connect the inner back corner to the outer from corner.
Essentially, this is the sole of the boot. When viewed from the top, the sole should be a solid shape. If viewed from the bottom, it needs to have parallel rows of "grip" lines.

Source: www.wikihow.com
RELATED VIDEO
Astronaut drawing

Badarttutorials EP019 Drawing an Astronaut

Girl Astronaut Drawing
Share this Post
latest post
-
 Astronaut Edwin Aldrin July 27, 2026
 -
 Astronaut Costumes Rental July 21, 2026
 -
 First black astronaut to travel in space July 15, 2026
 -
 Astronaut movies July 9, 2026
 -
 Astronaut Collins July 3, 2026
 -
 How much is an Astronaut suit June 27, 2026
 -
 First Female Canadian astronaut June 21, 2026
 -
 Salary astronaut June 15, 2026
 -
 Clayton Anderson, astronaut June 9, 2026